
Fix a cutout that comes out the wrong size
Find out whether a pocket that rattles or binds comes from the photo, the paper size, Clearance or your printer, and fix that cause.
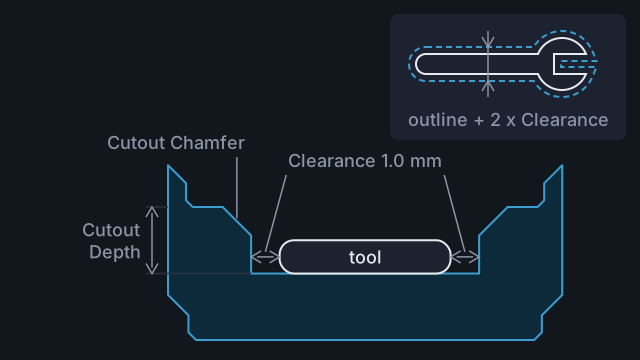
The pocket is the traced outline grown by the Clearance on every side, 1 mm by default. When a tool rattles or will not go in, either the outline is off or the bin and the print are. One measurement tells you which.
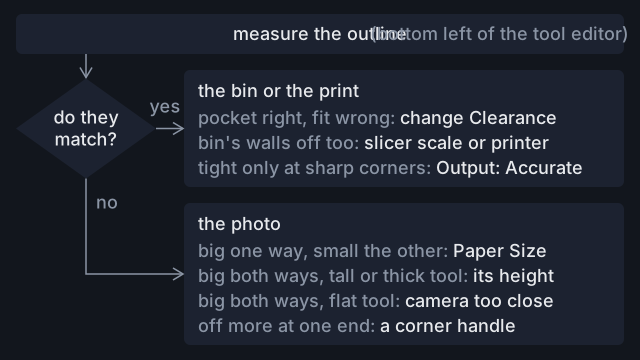
1. Measure the outline
Open the tool from your library. The bottom-left corner gives the outline's size, like 150.0x42.0 mm. That is the size of the box round it. If the outline sits at an angle, click Auto to square it up first. A bin holding the tool turns with it. Measure the tool with calipers or a ruler, the same way up. If they match, the photo is fine: go to step 3. If not, read on.
2. If the outline is off
| What you see | Cause | Fix |
|---|---|---|
| Too big one way, too small the other | Wrong Paper Size | Upload again with the right size |
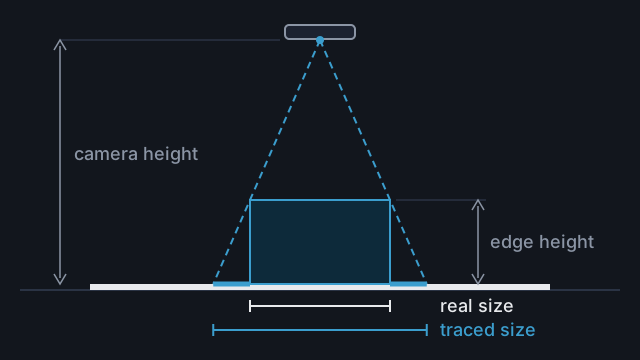
| Too big both ways, on a tall or thick object | Its top is closer to the camera | Trace tall or thick objects |
| Too big both ways, on a flat tool | Camera too close | Set the size from a measurement |
| Off more at one end than the other | A handle missed its corner | Upload again and place the handles exactly |
Wrong paper size
Tracefinity stretches the sheet in your photo to the size you pick, so a wrong pick distorts the outline differently along and across the sheet. Paper Size starts on A4.
| Sheet you used | Size you picked | Along the long edge | Across |
|---|---|---|---|
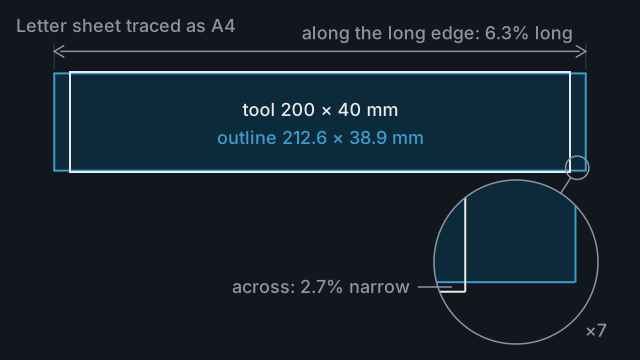
| Letter | A4 | 6.3% long | 2.7% narrow |
| A4 | Letter | 5.9% short | 2.8% wide |
| Tabloid | A3 | 2.7% short | 6.3% wide |
| A3 | Tabloid | 2.8% long | 5.9% narrow |
A 200 mm spanner lying along a Letter sheet traced as A4 comes out about 213 mm long, with a 40 mm head about 1 mm too narrow. The Size fields cannot correct this because they scale both directions by the same amount.
Camera too close
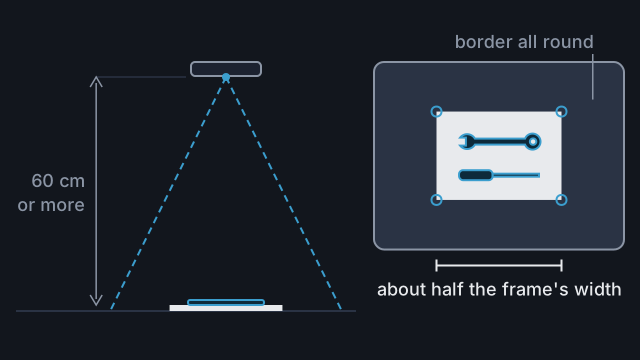
A flat tool's top edge also sits closer to the lens than the paper. From 30 cm, a spanner 6 mm thick traces about 2% large; from 60 cm, about 1%. Tracefinity warns when the photo's camera details put it closer than about 45 cm. With the tool under the camera, the error is roughly the same in every direction, so set the size from a measurement. This does not need a new trace.
A handle missed its corner
Each handle sets the scale near its corner. One 3 mm past the corner of an A4 sheet throws sizes out by 1 to 1.5% near that corner. The corners cannot be moved after the trace, so upload the photo again and zoom in on each corner as you place it.
3. If the outline is right
The pocket should be the outline plus twice the Clearance: a 150.0 mm outline with 1 mm of Clearance gives a 152 mm pocket. Measure a straight stretch of the printed pocket.
- Pocket right, fit wrong: change Clearance in the bin's sidebar. Each 0.1 mm adds 0.2 mm to the pocket. See Get a snug fit.
- Pocket off: measure across the bin's walls. Each side should be 42 mm per grid unit less 0.5 mm, so 83.5 mm on a 2u side. If the outside is off by the same percentage, check the slicer's scale is 100%, then calibrate your printer. If only the pocket is small, your printer prints holes small: raise Clearance by half the shortfall.
- Tight only at sharp corners or tips: the smoothed outline rounds them. Set the tool to Output: Accurate, as in Fix a trace.
Common mistakes
- Changing Clearance to fix a percentage error. Clearance adds the same amount everywhere. A 3% error is 6 mm on a 200 mm spanner but under 1 mm on a 25 mm hex key.
- Using the Size fields for a paper-size error. They scale both directions equally, and this error is not equal.
- Measuring the print first. Without the outline's size you cannot tell the photo from the printer.
Reference
More guides
Trace tall or thick objects at the right size
Why tall objects trace too large, and how to shoot, measure and set the size so the pocket fits.
Get a snug fit
Check the outline on paper, print a shallow test pocket, then set Clearance so tools drop in without rattling.
Take a photo that traces accurately
Set up the sheet, surface and light, then frame the photo so Tracefinity scales and traces your tools correctly.