
Trace a whole set in one photo
Lay a set out on one sheet, trace it once, then pick and name the tools to keep within your plan's limits.
A set of hex keys, screwdrivers or spanners can share one sheet and one trace. Tracefinity gives each tool its own outline, and you pick which to keep.
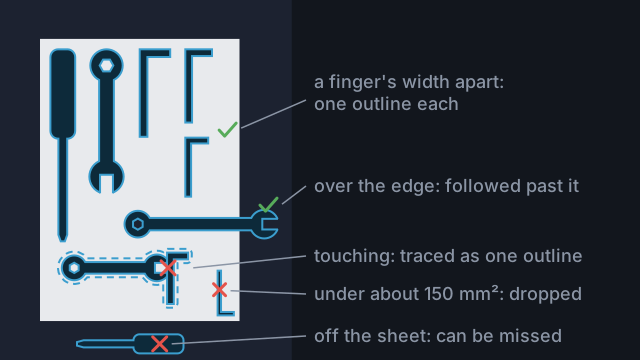
What goes wrong is tools touching. They come back as one outline, and the editor cannot split it.
1. Lay the set out
- Lay every tool flat, the way up you want it to sit in its pocket, with a clear gap round each one. A finger's width is plenty. Tools that touch or nearly touch trace as one outline.
- Keep the tools on the sheet. One can hang over an edge, but one lying fully off the sheet can be missed. Longer tools have their own guide.
- For a big set, use A3 or Tabloid paper. Paper Size starts on A4, so pick the size you used when you set the corners.
- Anything smaller than about 150 mm² seen from above is dropped as noise. This can include the smallest hex keys in a set. See Trace small or thin tools.
2. Trace once
Set the corners and paper size, then click Continue. However many tools are on the sheet, one trace finds them all.
The photo uses one of your plan's traces, counted as soon as the trace finishes.
3. Choose and name the tools
Each tool comes back as its own outline, listed as tool 1, tool 2 and so on. Nothing is selected at first.
- Click an outline to select it. Its row in the list gets a tick, and the save button counts up, for example Save 3 tools.
- Click the pencil on a row to rename that tool, type the name and press Enter. Library search matches names, so name each tool now.
- Leave out anything you do not want, like a stray shadow.
- When every tool you want is ticked, click the save button.

Saving takes you to your library, and the app has no list of earlier photos to come back to. Select everything first. If you miss one, press your browser's Back button: the page reopens with every outline, without tracing again.
4. Put them in bins
Each tool is saved on its own, so the layout on the sheet is not kept. In a bin, click a tool in the library strip to add it, then drag it into place. Plan a whole drawer covers spreading a set over several bins.
How a set counts against your plan
- The photo uses one trace whether you keep one tool or ten.
- Each tool you save takes one of your plan's tool slots: 3 on Free, 50 on Pro, 200 on Workshop. Outlines you leave unselected take none.
- When every slot is in use, saving is refused until you delete tools you no longer need or upgrade. Keep the photo's page open while you do that in another tab, then save again.
Make your traces go further covers the allowance in full.
Common mistakes
- Tools touching. They trace as one outline, which the editor cannot split. Space them out and take a new photo.
- Saving before every tool is selected. Press your browser's Back button to get back to the outlines.
- Leaving the names as tool 1, tool 2. Numbered tools are hard to find later. Rename them with the pencil, or later by clicking the name at the top of the tool editor.
- Leaving Paper Size on A4 for a bigger sheet. An A3 sheet traced as A4 comes out about 29% too small.
Reference
More guides
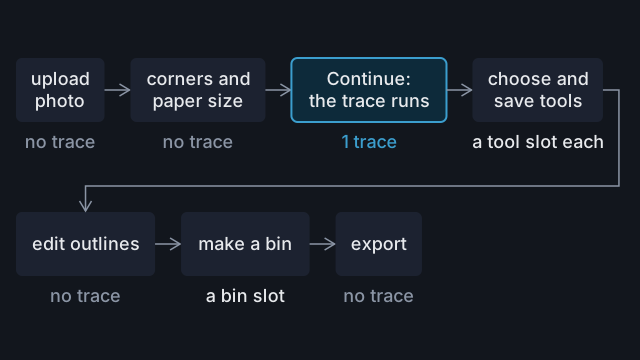
Make your traces go further
What uses a trace and when it counts, how to get several tools from one photo, the free monthly bonus and when an upgrade makes sense.
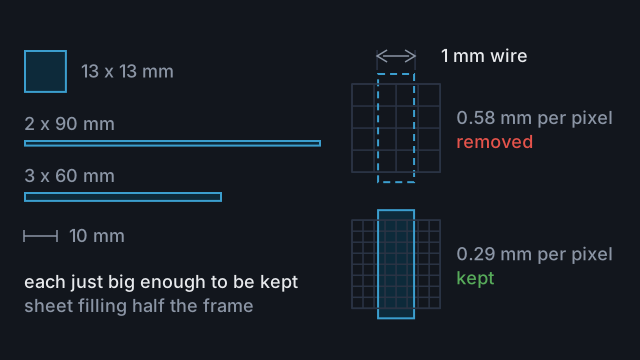
Trace small or thin tools
How small a tool Tracefinity keeps, how thin a part survives, and how to frame bits, hex keys and blades so they trace whole.
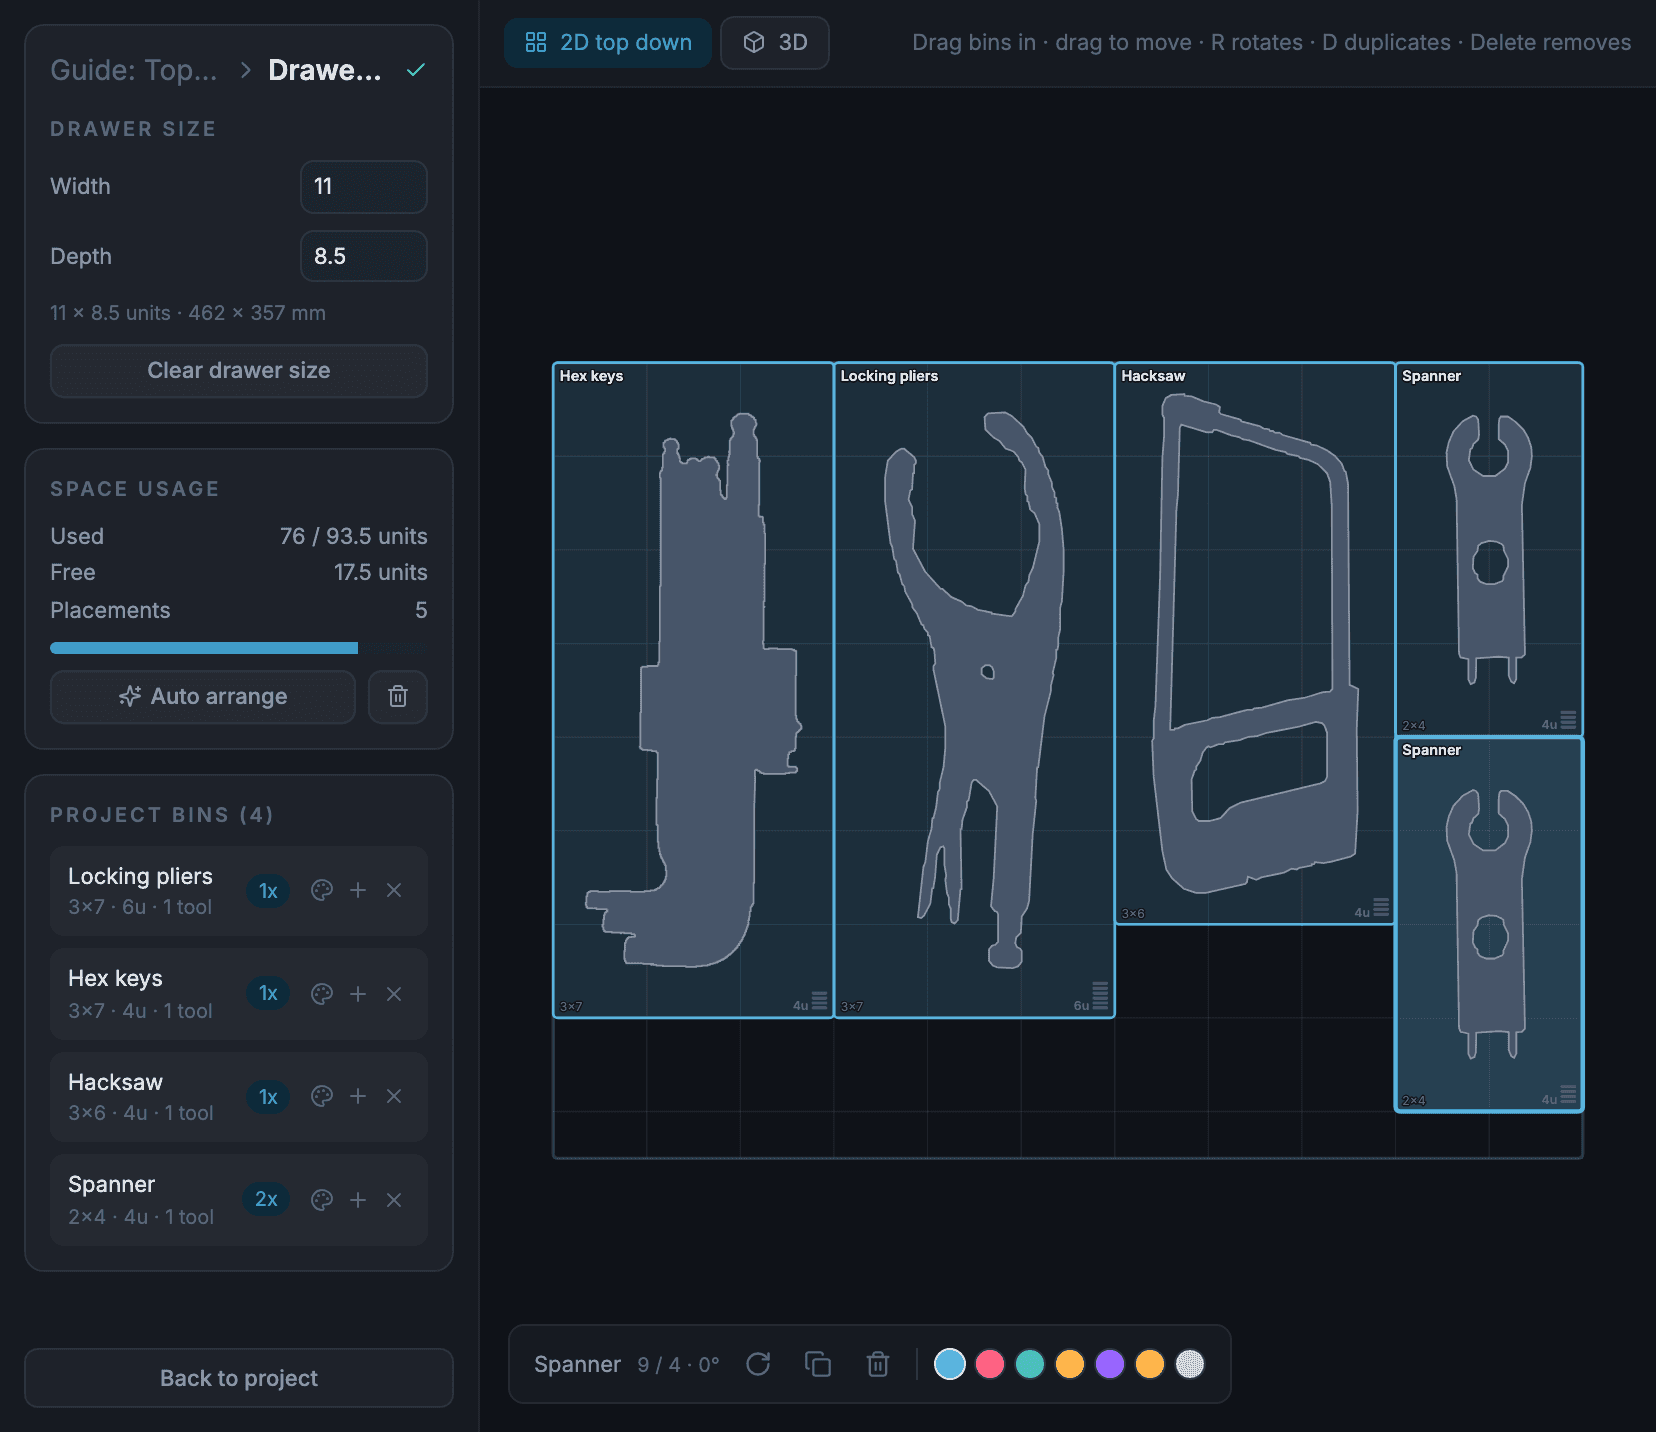
Plan a whole drawer
Measure a drawer, make a project and its bins, then lay them out in a drawer plan and check the fit in 3D before you print.